How to Connect Retro Consoles to a Modern TV: RF, Composite, S-Video, RGB and Upscalers
RF, composite, S-Video, RGB, component and upscalers explained: how to get the best picture from a classic console on a flat-panel TV.
Plug an old console into a new 4K television and the result is often disappointing: a blurry, smeary picture, colors bleeding into each other, a noticeable delay between pressing a button and seeing Mario jump, or simply a black screen with a “no signal” message. None of this means the console is broken. Classic systems were designed for cathode-ray tube (CRT) televisions, and modern flat panels handle their signals very differently.
This guide explains each common analog video output, from RF to RGB, what quality to expect from each, why the low-resolution “240p” signal used by many older consoles causes problems on modern TVs, and where external upscalers and official HDMI options fit in.
Why Old Consoles and New TVs Don’t Get Along
Analog television in the CRT era was built around interlaced video. In NTSC regions, a frame was made of 525 lines split into two “fields”: one field drew the odd lines and the next drew the even lines, and the eye blended them together. PAL regions used 625 lines in the same way.
Many older consoles and home computers took a shortcut. Instead of sending alternating odd and even fields, they sent the same field type every time. The result, as reference sources describe it, is a progressive signal of about 262 lines (NTSC) or 312 lines (PAL), with half the usual vertical resolution. Fans usually call this “240p” or “288p,” after the number of visible lines, and Nintendo’s own Wii developer documentation used the term “double-strike.” On a CRT, this produces the familiar pattern of bright lines with darker gaps between them, the scanlines many retro players love.
A modern TV has no electron beam and a fixed grid of pixels, so it has to convert any incoming analog signal into a digital image and scale it to the panel’s resolution. Many TVs assume a low-resolution analog signal is ordinary interlaced video and run it through a deinterlacer meant for broadcast TV. That processing can blur the image, add flicker or combing artifacts, and add input lag. Some sets do not accept 240p at all on certain inputs.
Mid-1990s consoles such as the PlayStation, Saturn and Nintendo 64 still used low-resolution progressive output for most games, so the problem is not limited to 8-bit and 16-bit machines. Interlaced and higher standard-definition modes became more common in the Dreamcast era.
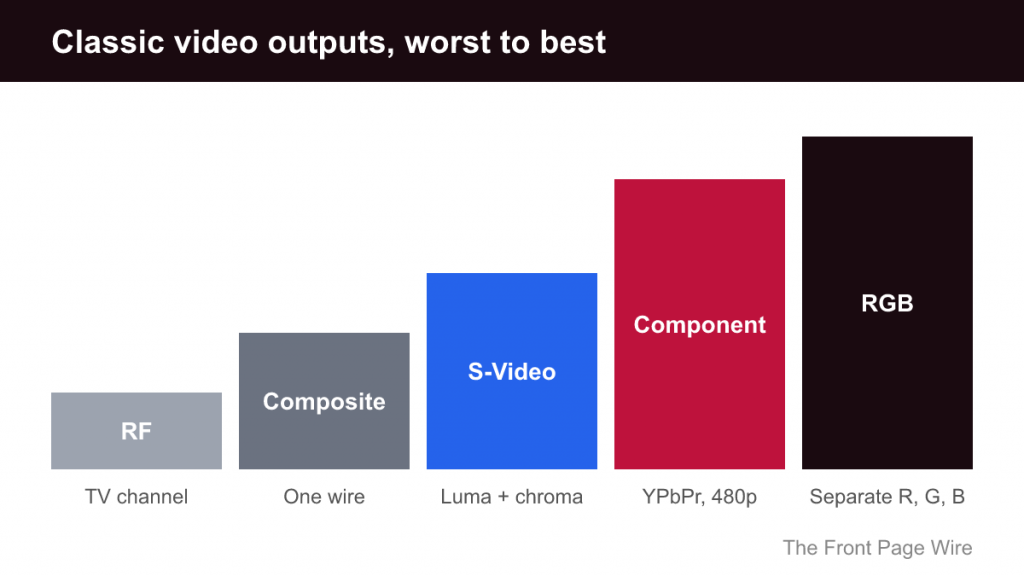
The Video Outputs, From Worst to Best
Classic consoles offer different combinations of outputs depending on model and region. In rough order of picture quality, here is what each type means.
RF (radio frequency)
RF output modulates the picture and sound into a TV channel signal, just as an antenna broadcast would. It was used on early consoles because every TV of the period had an antenna input. It is also the lowest-quality option: the signal is combined, modulated and then decoded again, introducing noise, interference and blurred detail. The original Famicom and many early systems relied on it. Many modern TVs can still tune analog RF channels, but some have dropped analog tuners entirely, in which case RF simply will not work.
Composite video
Composite sends the whole picture down a single wire, usually the yellow RCA plug, with separate audio wires. Because brightness (luma) and color (chroma) share one channel, the TV has to separate them again, which causes color bleeding and “dot crawl” around sharp edges. Composite is a clear step up from RF and is supported by a large number of consoles, including the front-loading NES and most systems from the 16-bit era onward.
One historical footnote: some developers designed graphics with composite blur in mind, relying on it to blend dithered patterns into smoother shades or transparency effects. On a very sharp RGB setup those patterns appear as visible checkerboards. Neither look is “wrong,” but it is worth knowing why some games look different over RGB.
S-Video
S-Video splits the signal into two channels: luma (brightness plus sync) and chroma (color). Because the TV no longer has to pull them apart, S-Video avoids most dot crawl and does not need the filtering that dulls composite images. The connector became widespread after JVC adopted it for S-VHS in 1987. Several Nintendo and Sega consoles can output S-Video, though support varies by model and region. For example, reference sources note that the GameCube offered S-Video on NTSC units, while PAL units offered RGB instead.
RGB
RGB sends red, green and blue as separate signals, plus a sync signal. There is no mixing of color and brightness at all, so it produces the sharpest and cleanest analog picture a classic console can deliver. Many consoles generate RGB internally, and several expose it on their AV ports: the Sega Master System, Mega Drive/Genesis and Super Nintendo can all output RGB, which is why they are favorites for RGB setups. Others, including most Nintendo 64 units, did not provide RGB from the factory.
RGB was common in Europe because of SCART (described below) and in Japan through a related 21-pin connector known as RGB-21 or JP-21, which uses a different pinout. In North America, consumer TVs with RGB inputs were rare, so RGB use there is mostly a modern hobbyist practice.
Component (YPbPr)
Component video, the red, green and blue RCA plugs found on many DVD players, separates brightness from two color-difference signals. It can be converted losslessly to RGB, so quality is excellent. It became the preferred high-quality output in the PlayStation 2, original Xbox, GameCube and Wii era, and supports 480p progressive scan on games that offer it. One caveat: some TVs never accepted 240p over component, which matters if you play older games through backward-compatible hardware.
SCART: Europe’s Universal Connector
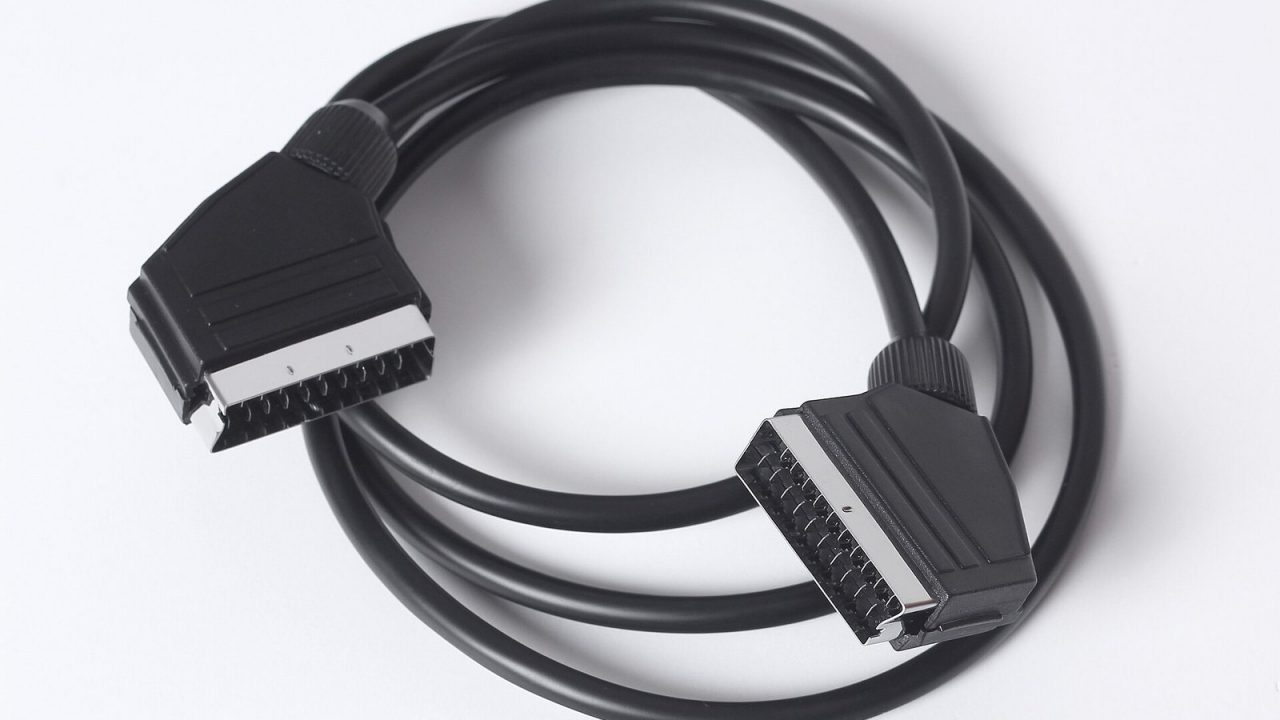
SCART (also called Péritel) is a 21-pin connector created in France by a manufacturers’ association in the mid-1970s. It first appeared on televisions in 1977 and was made compulsory on new French TVs from 1980. It became the standard audio-video connector across much of Europe.
A single SCART cable can carry composite video, RGB with sync, stereo audio and control signals. S-Video was added later using some of the RGB pins. This flexibility is why SCART is still the most common connector in RGB retro setups, even in North America, where many upscalers include a SCART input.
There is an important trap: not all SCART cables are equal. Cheaper cables often wire only about ten of the pins and carry just composite video. If you buy a “SCART cable” for a console expecting RGB and get a composite-quality picture, a composite-only cable is a likely culprit. Look for cables clearly described as RGB, and be aware that some consoles need RGB enabled in a menu or require a cable designed for their specific port.
Which Classic Consoles Support Which Signals
Exact output support depends on the model revision and region, so treat the table below as a broad guide rather than a guarantee. Always check documentation for your exact model before buying cables.
| Console family | Typical factory outputs | Notes |
|---|---|---|
| Atari 2600 and other early systems | RF | Composite or better generally requires modification |
| Famicom / NES | RF on the original Famicom; RF and composite on the front-loading NES | No factory RGB |
| Master System, Mega Drive / Genesis | RF, composite, RGB | Popular RGB choices; cable depends on model |
| Super Famicom / SNES | Composite, S-Video, RGB on many units | Some later revisions reduced the available signals |
| Nintendo 64 | Composite, S-Video on many units | Most units lack factory RGB |
| PlayStation, Saturn | Composite, S-Video, RGB (varies by model and region) | Mostly 240p output in games |
| Dreamcast, PS2, GameCube, Xbox, Wii | Composite, S-Video and/or RGB, component or VGA depending on system and region | Many games support 480p |
If you are still deciding which system to collect, video output is a practical factor worth adding to your list. Our beginner’s guide to collecting retro games covers the other considerations, and our console generations overview explains where each of these machines sits historically.
Upscalers and Line Doublers
The most effective way to connect an analog console to a modern TV is often to bypass the TV’s own analog processing entirely. An external upscaler accepts analog signals such as composite, S-Video, component or RGB, converts them to digital and outputs HDMI at a resolution the TV handles cleanly.
Good retro-focused upscalers are designed specifically for 240p content. Instead of treating it as interlaced video, they recognize it as progressive and multiply each line cleanly, avoiding the deinterlacing blur and much of the lag. Many offer optional scanline effects to approximate the look of a CRT. Several families of these devices exist; the RetroTINK range is one well-known example, and its maker currently lists models with SCART, composite, S-Video and component inputs and FPGA-based processing.
When comparing upscalers, consider:
- Inputs. Make sure it accepts the best signal your console can produce. An RGB-capable console gains most from an RGB or SCART input.
- Latency. Retro-specific devices are generally designed to add very little delay, but check independent reviews.
- Handling of 240p and 480i. Some games switch between modes, for example in menus, and a good scaler copes with the change smoothly.
- Your TV’s game mode. Even with an upscaler, enable the TV’s game mode to minimize its own processing delay.
Cheap generic converters sold as “composite to HDMI” adapters vary widely. Many simply pass the signal through the same kind of deinterlacing that causes problems in the first place, so results can be no better than plugging straight into the TV.
Official HDMI Options and Alternatives
Not everyone wants cables, sync strippers and scaler settings. There are simpler official routes to a clean HDMI picture:
- Plug-and-play mini consoles. Manufacturers including Nintendo and Sega have released miniature versions of classic consoles with built-in game libraries and HDMI output. They connect like any modern device.
- Modern re-releases. Publisher compilations and subscription libraries on current consoles run classic games natively over HDMI, often with display filters and save features.
- Later official hardware. Some later consoles play earlier libraries with better output. For example, the PlayStation 2 can play original PlayStation discs and outputs the low-resolution modes those games request.
These routes trade some authenticity for convenience. Many collectors keep original hardware for the cartridges they own and use official re-releases for everyday play.
Common Mistakes When Setting Up Retro Consoles
- Assuming any cable with the right plug gives the best signal. SCART cables in particular may be composite-only.
- Forgetting the TV’s game mode. Picture enhancements, motion smoothing and noise reduction add delay.
- Chaining adapters. Converting RGB to component and then to HDMI through several cheap boxes can degrade the image and add lag.
- Mixing regions without checking. PAL consoles run at 50Hz and NTSC consoles at 60Hz, and some older TVs or scalers handle only one.
- Opening consoles for modifications without experience. RGB and other video modifications exist for some systems, but they involve soldering inside valuable hardware. If you are not experienced, leave this to a reputable professional.
A word on CRTs: many collectors still use tube televisions for exactly the reasons described above. If you go that route, never open a CRT set yourself. Tubes can hold dangerous high voltages long after being unplugged.
There is no single correct configuration. Start with the best output your console offers, check which inputs your TV or scaler accepts, and change one thing at a time so you can see what actually helps.